

The week before Thanksgiving 2011, I grabbed the top of my mannequin and molded some cables around it. I pictured myself in a jaw-dropping neon orange sweater saying "this old thing? I made it myself." Objectively, that isn't a great reason to do anything. In my case, it set me up for disappointment.
I was a 15-year-old freshly out of braces trying to be impressive and had never once looked at a sweater pattern, so I made a few strategic errors. First, I didn't understand the difference between my measurements and a sweater's finished measurements - hint from the present: a sweater should be bigger than what it covers. Then I made the choice to pair chunky yarn with size 4 needles. Two days before Thanksgiving and 5 skeins in, I was still toting around a tank top on a torso. That year I trudged through the woods of my great aunt's property in giant hiking boots and another skin-tight bright orange sweater that I bought from The Limited, a failure.
The picture of the first and only time I wore this sweater - before the tails had even been woven in, and several months after Thanksgiving - illustrates my problem. With ten years worth of hindsight, the original sweater really isn't that bad. If you overlook the fact that I paired it with a beige button-down, this walking sauna was a good first effort. This is a sweater - and a teenager - that deserves a do-over.
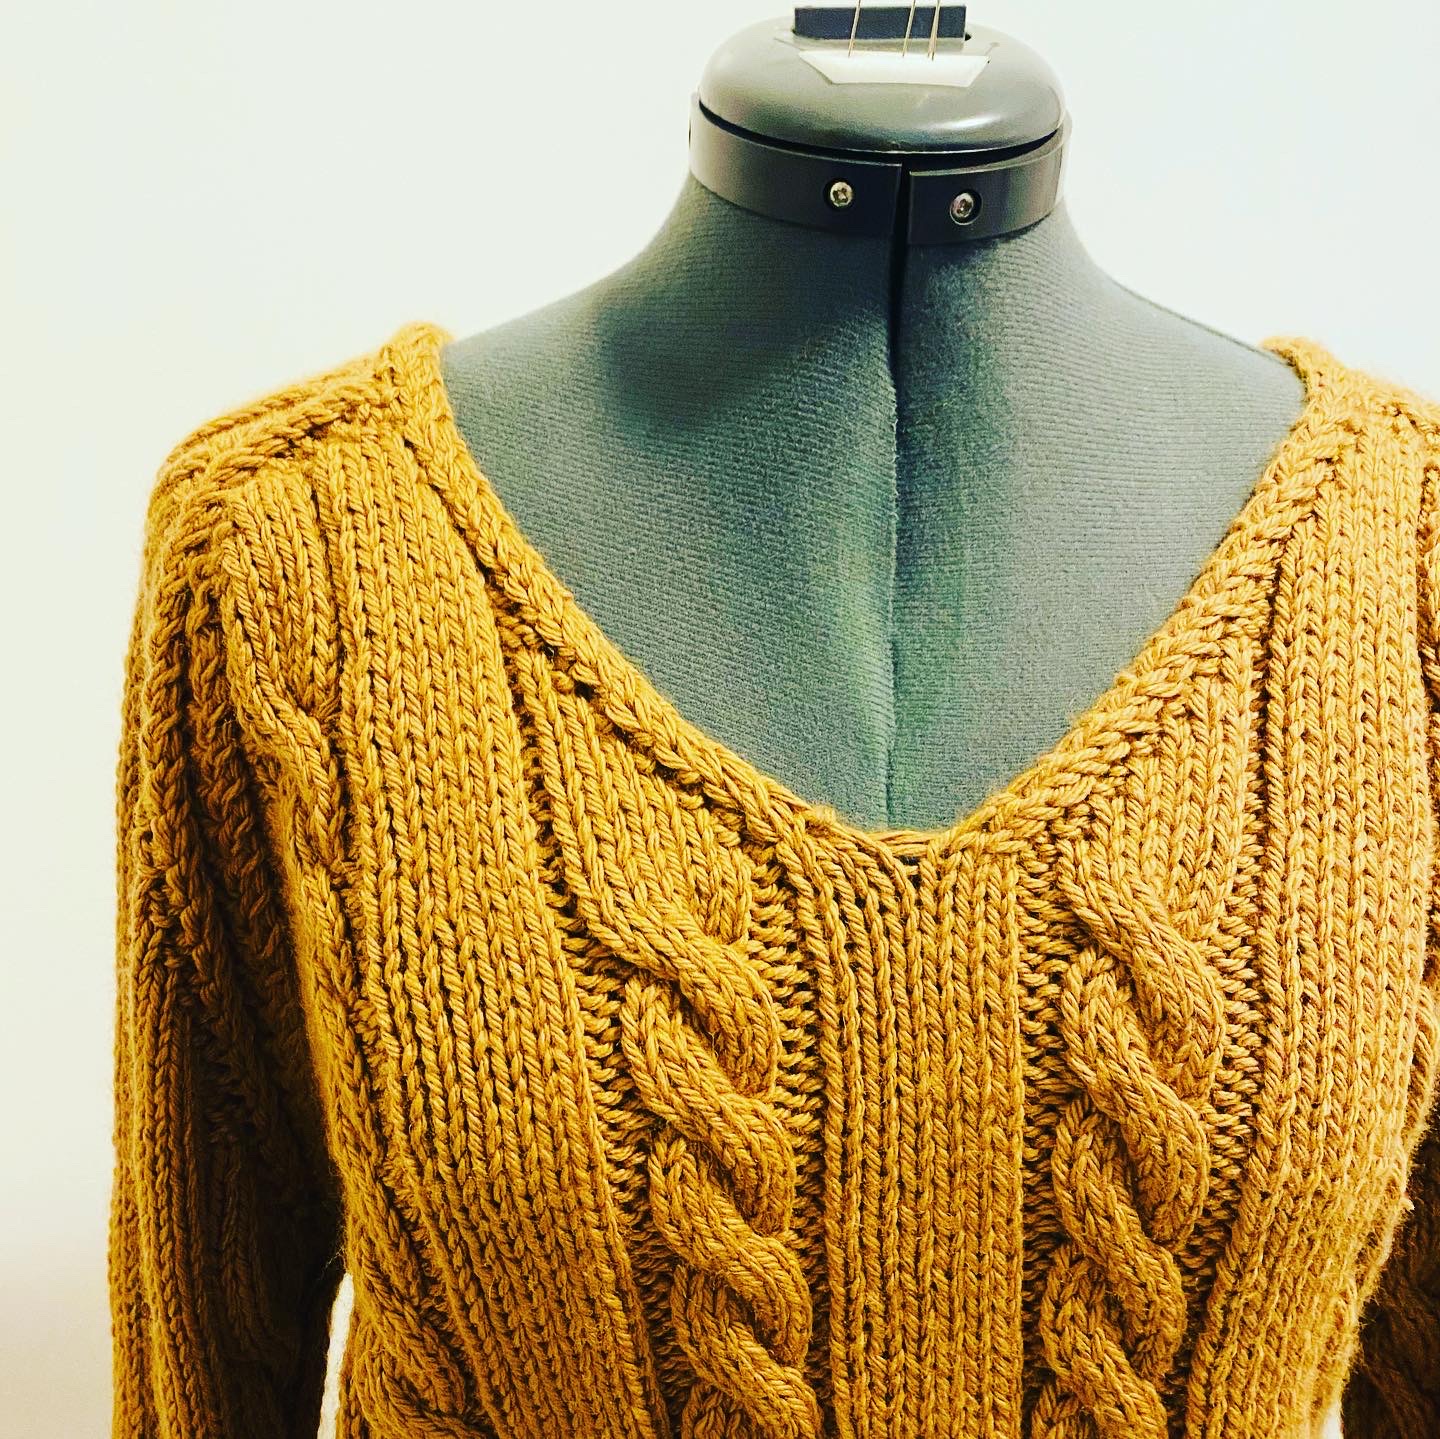
Twist V-Neck Sweater

Materials
Yarn: Berroco Vintage Chunky in Chana Dal, 7 skeins (equal to 952.0 yards/870.5 meters, 24.69 ounces)
Needles: US 8 - 5.0 mm and US 10 - 6.0 mm (circular)
Gauge
Size 10 needles
Stockinette st
16 stitches and 20 rows = 4 inches
Abbreviations
Kf&b - Knit front and back
Pf&b - Purl front and back
TS - K 2nd st, leave on needle, k first st, slip both stitches off needle.
C: Sl3 onto CN, H2F, k3, k3 off CN
PC: Sl3 onto CN, H2F, p3, p3 off CN
WS: Wrong side
RS: Right Side
Patterns
Cable Pattern 1 (in the round)
Rows 1-6: K3, p2, k6, p2, k3
Row 7: K3, p2, C, p2, k3
Cable Pattern 2 (straight needles)
Maintain pattern as established in Cable Pattern 1, alternating C and PC
Body
CO 128 with size 8 needles
Row 1: *K1, p1; rep from * to end. Join in round
Continue in established 1x1 rib for 3”
Row 1: *K1, p1, k1, pf&b; repeat from * to end
Row 2: *K1, pf&b, k1, p2; repeat from * to end
Switch to size 10 needles
Knit in Cable Pattern 1 until sweater measures 12” in length from bottom of rib. Place marker in center of row.
Row 1: P1, TS, p2tog, continue in cable pattern until 5 stitches before the marker, p2tog, TS, p1. Place remaining stitches on stitch holder.
Raglan Armholes (Back)
Row 1 (WS): K1, p2, k2, knit in Cable Pattern 2 until last 5 stitches, k2, p2, k1
Row 2: P1, TS, P2tog, continue in Cable Pattern 2 until last 5 stitches, p2tog, TS, p1
Continue raglan armhole pattern until 56 stitches remain. End on WS row. BO
Raglan Armholes (Front)
Pick up front stitches from stitch holder
Row 1 (RS): P1, TS, p2tog, knit Cable Pattern 2 to last 5 stitches, p2tog, TS, p1
Row 2: K1, p2, k2, continue in cable pattern until last 5 stitches, k2, p2, k1
Continue raglan armhole pattern until 79 stitches remain. End on WS row.
Row 1: P1, TS, p2tog, k29 in cable pattern, p2tog, TS, p1. Place remaining stitches on stitch holder.
Row 2 (WS): K1, p2, k2, k in cable pattern to last 5, k2, p2, k1
Row 3: P1, TS, p2tog, k in cable pattern to last 5, p2tog, TS, p1
Repeat rows 2-3 until 17 stitches remain. End on WS row
Row 1 (RS): BO to last 4, complete raglan edge.
Row 2: K1, p2, k1
Row 3: P1, TS, p1
Continue until raglan edge extension measures 2.5”
Front (Left)
Row 2: (WS) k1, p2, k2, k in cable pattern to last 5, k2, p2, k1
Repeat rows 1-2 until 17 stitches remain. End on RS row
Row 1: (WS) BO p-wise to last 4, complete raglan edge
Row 2: k1, p2, k1
Row 3: p1, TS, p1
Continue until raglan edge extension measures 16”. Place on stitch holder.
Sleeves
CO 36 with size 8 needles
Row 1: *K1, p1; repeat from * to end
Row 2: *P1, k1; repeat from * to end
Continue for 3 inches, ending on WS row. Evenly increase 4 stitches on last row.
Switch to size 10 needles
(RS) Knit in Cable Pattern 2, increasing 1 stitch on either size every inch until sleeve from bottom of rib measures 18". End in WS row. 68 stitches remain (no increases on final inch)
Row 1: P1, TS, p2tog, continue to last 5, p2tog, TS, p1
Row 2: K1, p2, k2, continue to last 5, k2, p2, k1
Repeat until 20 stitches remain, ending on WS row. BO
Make another sleeve, moving 8 stitches down in cable pattern. Sew raglan sleeve edges to raglan armholes (continuing past raglan armholes to meet neckline). Then sew extended raglan edge around the neckline. Sew ends of neckline together.
Comments